VyOS on GNS3
Sometimes you may want to test VyOS in a lab environment. GNS3 is a network emulation software you might use for it.
This guide will provide the necessary steps for installing and setting up VyOS on GNS3.
Requirements
The following items are required:
A VyOS installation image (.iso file). You can find how to get it on the Installation page
A working GNS3 installation. For further information see the GNS3 documentation.
VM setup
First, a virtual machine (VM) for the VyOS installation must be created in GNS3.
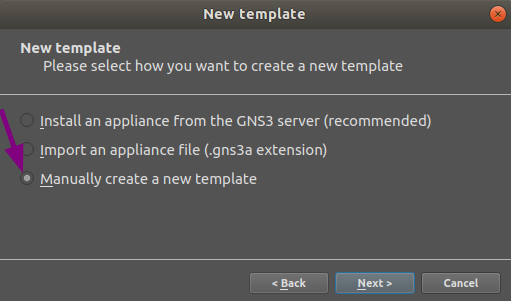
Go to the GNS3 File menu, click New template and select Manually create a new Template.
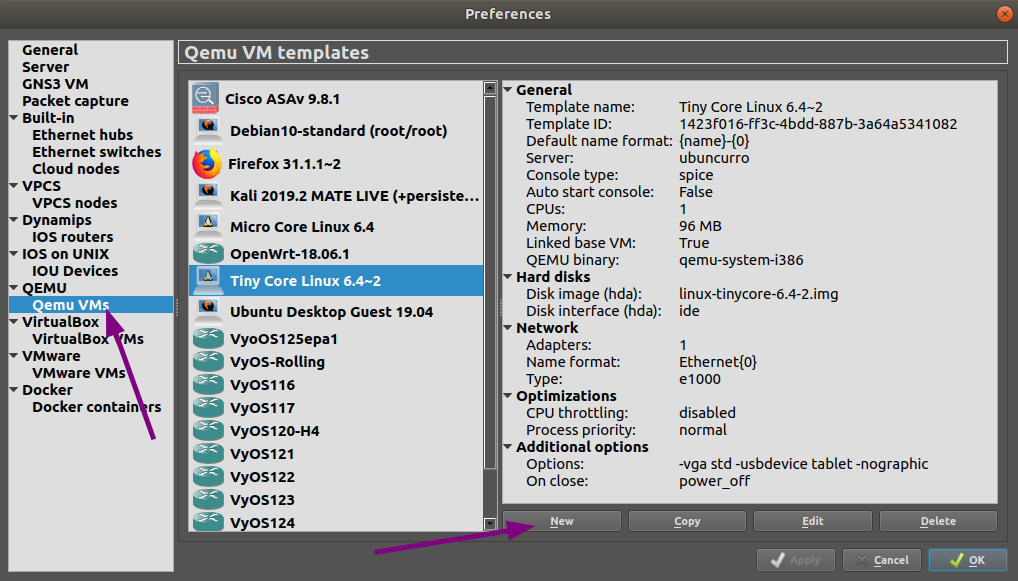
Select Quemu VMs and then click on the New button.
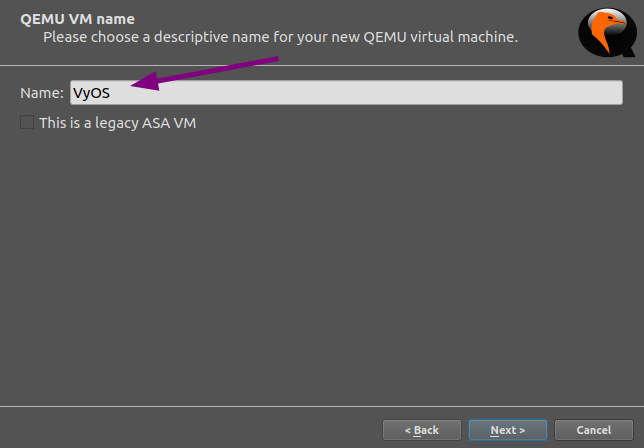
Write a name for your VM, for instance “VyOS”, and click Next.
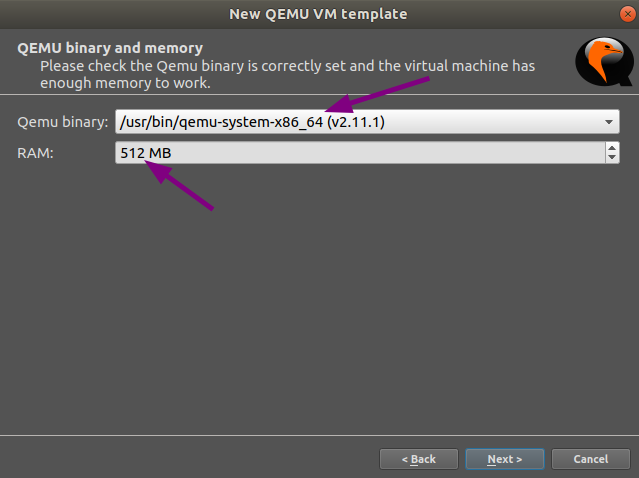
Select qemu-system-x86_64 as Quemu binary, then 512MB of RAM
and click Next.
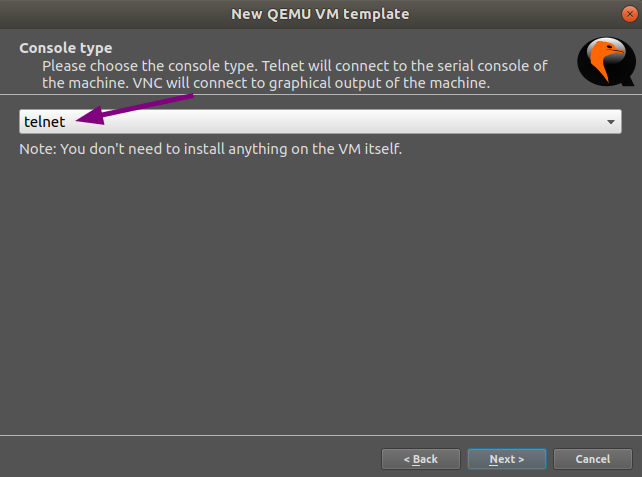
Select telnet as your console type and click Next.
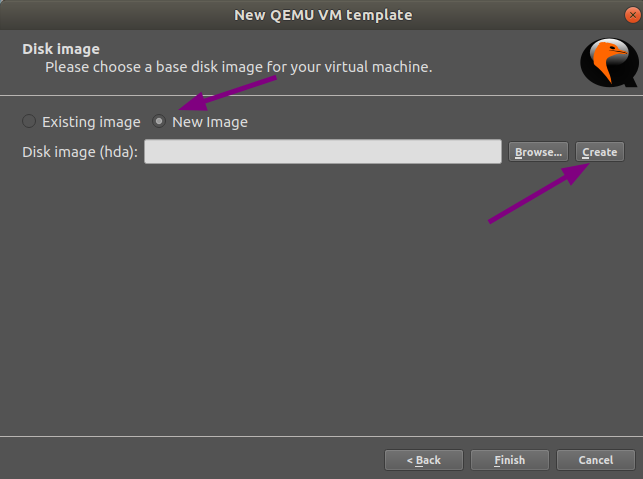
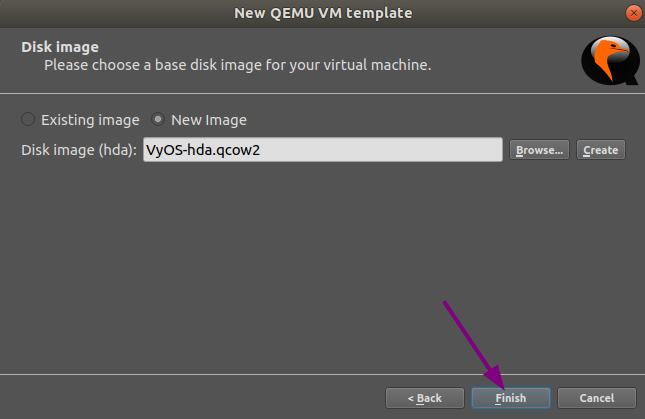
Select New image for the base disk image of your VM and click
Create.
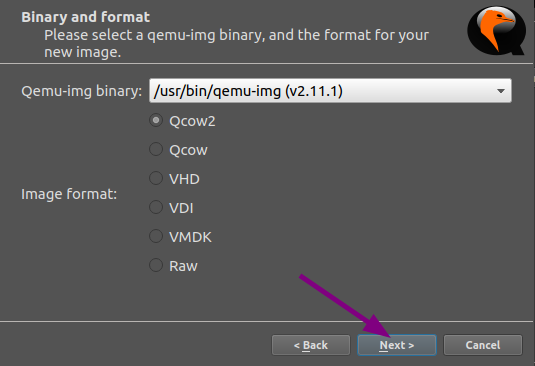
Use the defaults in the Binary and format window and click
Next.
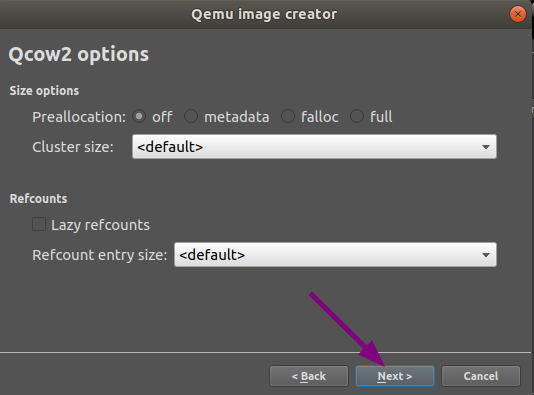
Use the defaults in the Qcow2 options window and click Next.
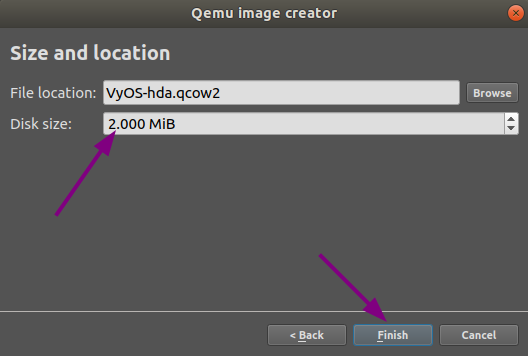
Set the disk size to 2000 MiB, and click Finish to end the Quemu
image creator.
Click Finish to end the New QEMU VM template wizard.
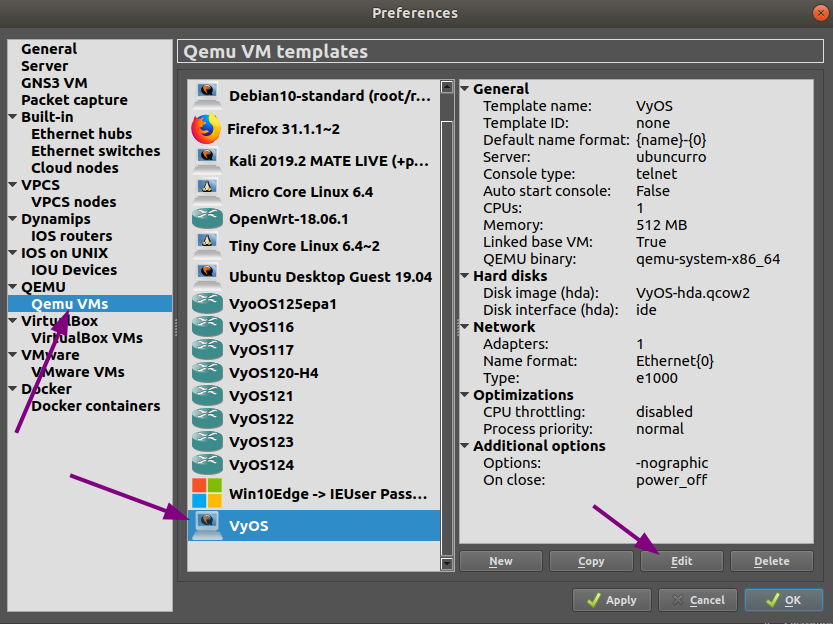
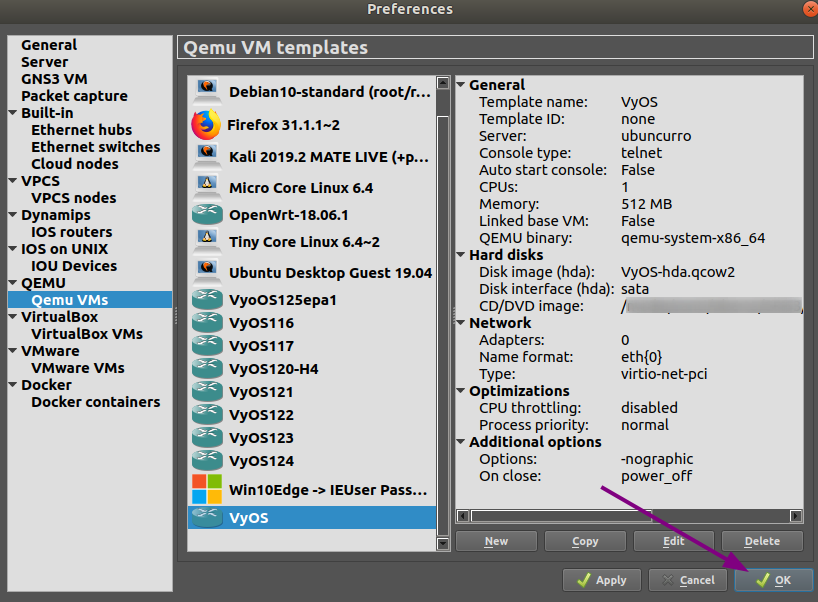
Now the VM settings have to be edited.
Being again at the Preferences window, having Qemu VMs
selected and having our new VM selected, click the Edit button.
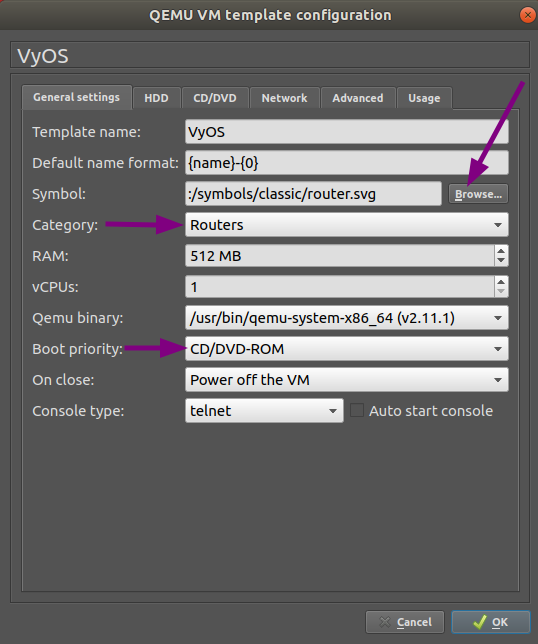
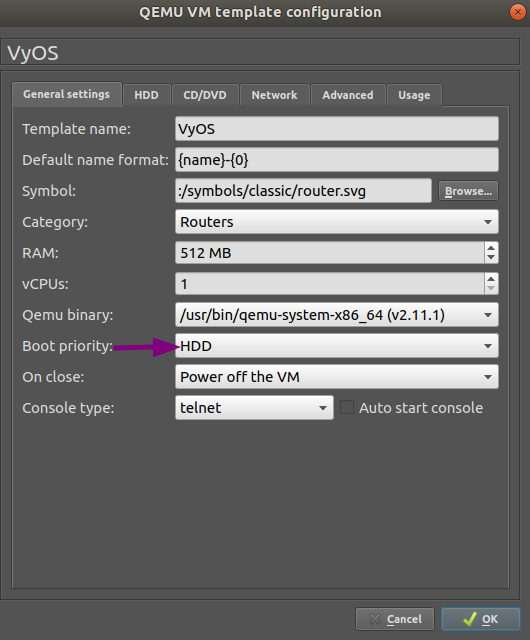
In the General settings tab of your QEMU VM template configuration, do the following:
Click on the
Browse...button to choose the Symbol you want to have representing your VM.In Category select in which group you want to find your VM.
Set the Boot priority to CD/DVD-ROM.
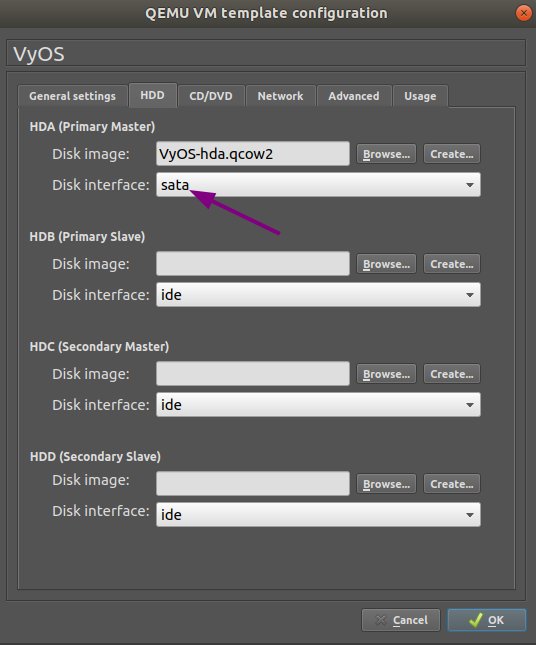
At the HDD tab, change the Disk interface to sata to speed up the boot process.
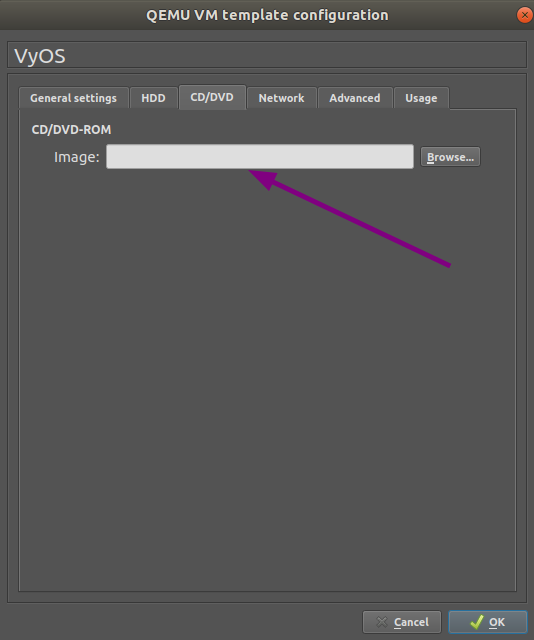
At the CD/DVD tab click on Browse... and locate the VyOS image
you want to install.
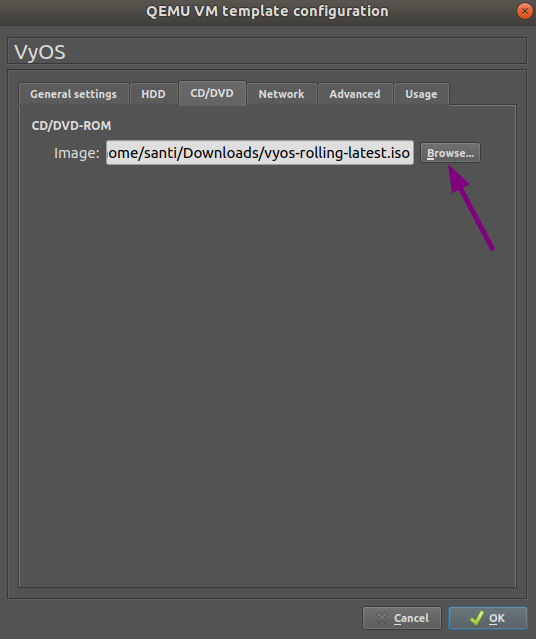
Note
You will probably want to accept, to copy the .iso file to your default image directory when you are asked.
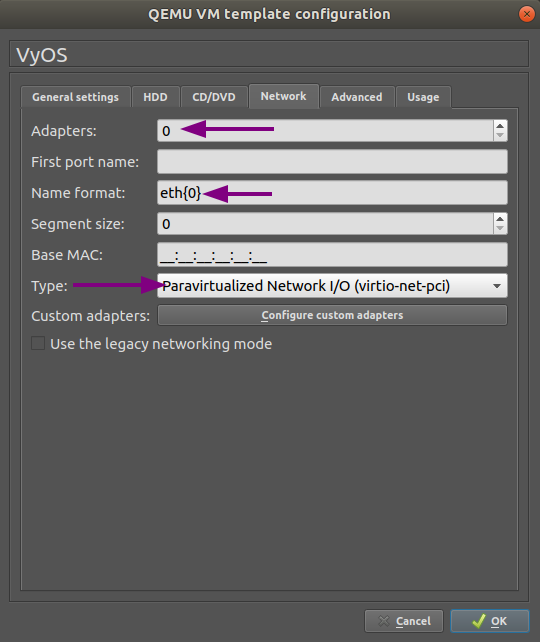
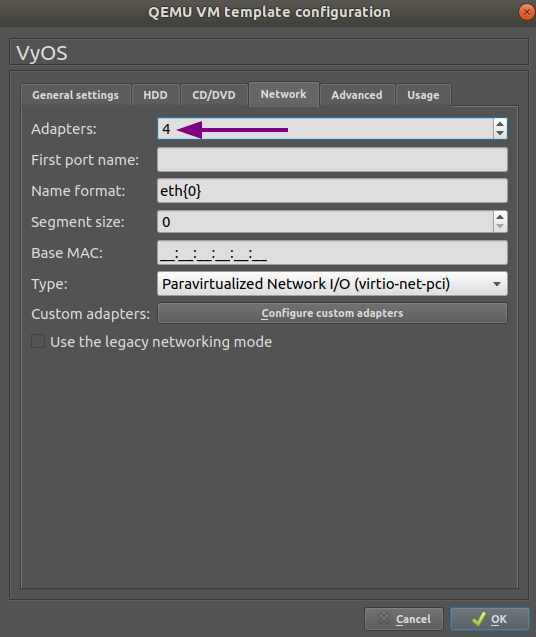
In the Network tab, set 0 as the number of adapters, set the Name format to eth{0} and the Type to Paravirtualized Network I/O (virtio-net-pci).
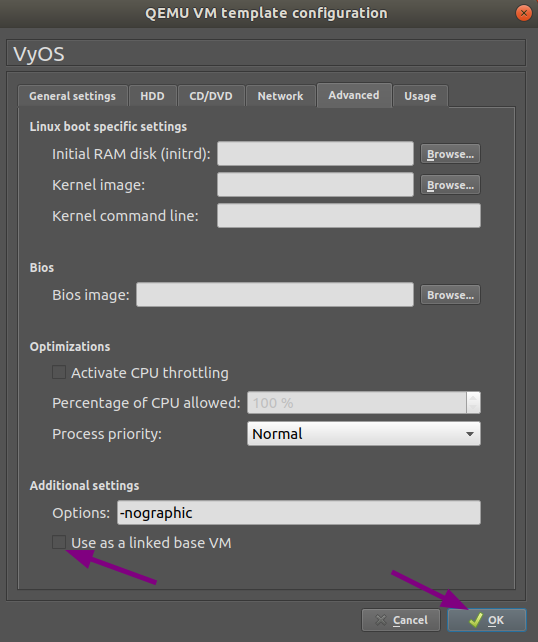
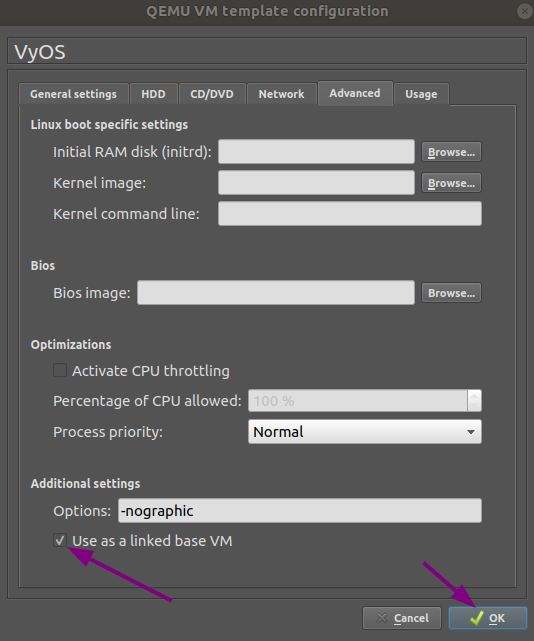
In the Advanced tab, unmark the checkbox Use as a linked base
VM and click OK, which will save and close the QEMU VM template
configuration window.
At the general Preferences window, click OK to save and close.
VyOS installation
Create a new project.
Drag the newly created VyOS VM into it.
Start the VM.
Open a console. The console should show the system booting. It will ask for the login credentials, you are at the VyOS live system.
Install VyOS as normal (that is, using the
install imagecommand).After a successful installation, shutdown the VM with the
poweroffcommand.Delete the VM from the GNS3 project.
The VyOS-hda.qcow2 file now contains a working VyOS image and can be used as a template. But it still needs some fixes before we can deploy VyOS in our labs.
VyOS VM configuration
To turn the template into a working VyOS machine, further steps are necessary as outlined below:
General settings tab: Set the boot priority to HDD
CD/DVD tab: Unmount the installation image file by clearing the Image entry field.
Set the number of required network adapters, for example 4.
Advanced settings tab: Mark the checkbox Use as a linked
base VM and click OK to save the changes.
The VyOS VM is now ready to be deployed.